Bodies and sprites
This article will teach us how to draw sprites on top of our Forge2D bodies.
Let's start by creating a Forge2D scene in which a box or a ball will appear at the top of the screen each time we click the screen.
We start by creating the class Box:
class Box extends BodyComponent {
Body createBody() {
final bodyDef = BodyDef(
position: Vector2(worldSize.x / 2, 0),
type: BodyType.dynamic,
);
final shape = PolygonShape()..setAsBoxXY(.25, .25);
final fixtureDef = FixtureDef(shape)
..density = 5
..friction = .5
..restitution = .5;
return world.createBody(bodyDef)
..createFixture(fixtureDef)
..angularVelocity = radians(180);
}
}
Notice that we added an angularVelocity so the box will rotate on its axis. Everything else is what we have been
doing in previous tutorials.
Now let's create a class Ball:
class Ball extends BodyComponent {
Body createBody() {
final bodyDef = BodyDef(
position: Vector2(worldSize.x / 2, 0),
type: BodyType.dynamic,
);
final shape = CircleShape()..radius = .25;
final fixtureDef = FixtureDef(shape)
..density = 5
..friction = .5
..restitution = .5;
return world.createBody(bodyDef)
..createFixture(fixtureDef)
..angularVelocity = radians(180);
}
}
Again, there is nothing special in this class. This ball will be rotating on its axis too.
Every time we click the screen, we want to add a ball or box randomly. Let's add this code:
class GameLesson05 extends MyGame with TapDetector {
Future<void> onLoad() async {
super.onLoad();
add(Floor());
}
void onTapDown(TapDownInfo info) {
super.onTapDown(info);
if (Random().nextBool()) {
add(Ball());
} else {
add(Box());
}
}
}
If we run the previous code, the result is this:

Adding sprites
Let's make the scene of white boxes and balls more fun. First, we will add these two images to the assets folder:
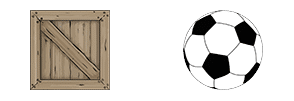
Box and ball sprites
Then, we update the pubspec.yaml file to add the assets' path.
  assets:
    - assets/images/
We will load the sprites and store them in the cache. On the class GameLesson05, we add this code to the
onLoad() function:
  Future<void> onLoad() async {
    super.onLoad();
    await loadSprite('ball.png');
    await loadSprite('box.png');

    add(Floor());
  }
Now we must retrieve the loaded sprites from the cache and add them to the box and the ball.
Let's start by overriding the onLoad() function from the Ball class:
Future<void> onLoad() async {
await super.onLoad();
final sprite = Sprite(gameRef.images.fromCache('ball.png'));
add(
SpriteComponent(
sprite: sprite,
size: Vector2(.5, .5),
anchor: Anchor.center,
),
);
}
The previous code retrieves the image from the cache and creates a new Sprite, then creates a new SpriteComponent
that will be in charge of drawing the image on top of the ball.
Updating the box code is very similar to the ball code. Let's take a look:
Future<void> onLoad() async {
await super.onLoad();
final sprite = Sprite(gameRef.images.fromCache('box.png'));
add(
SpriteComponent(
sprite: sprite,
size: Vector2(.5, .5),
anchor: Anchor.center,
),
);
}
Running the updated code will give us the following result:

Looks better right? Notice how Flame draws the sprites on top of the bodies, including updating the position, rotation, etc.