CRUD APP using Firebase Authentication, Firestore, Storage & Cubit
In this article, we will create a simple CRUD using Firebase and Cubit that will allow us to create, update and delete user information.
The final result will look like this:
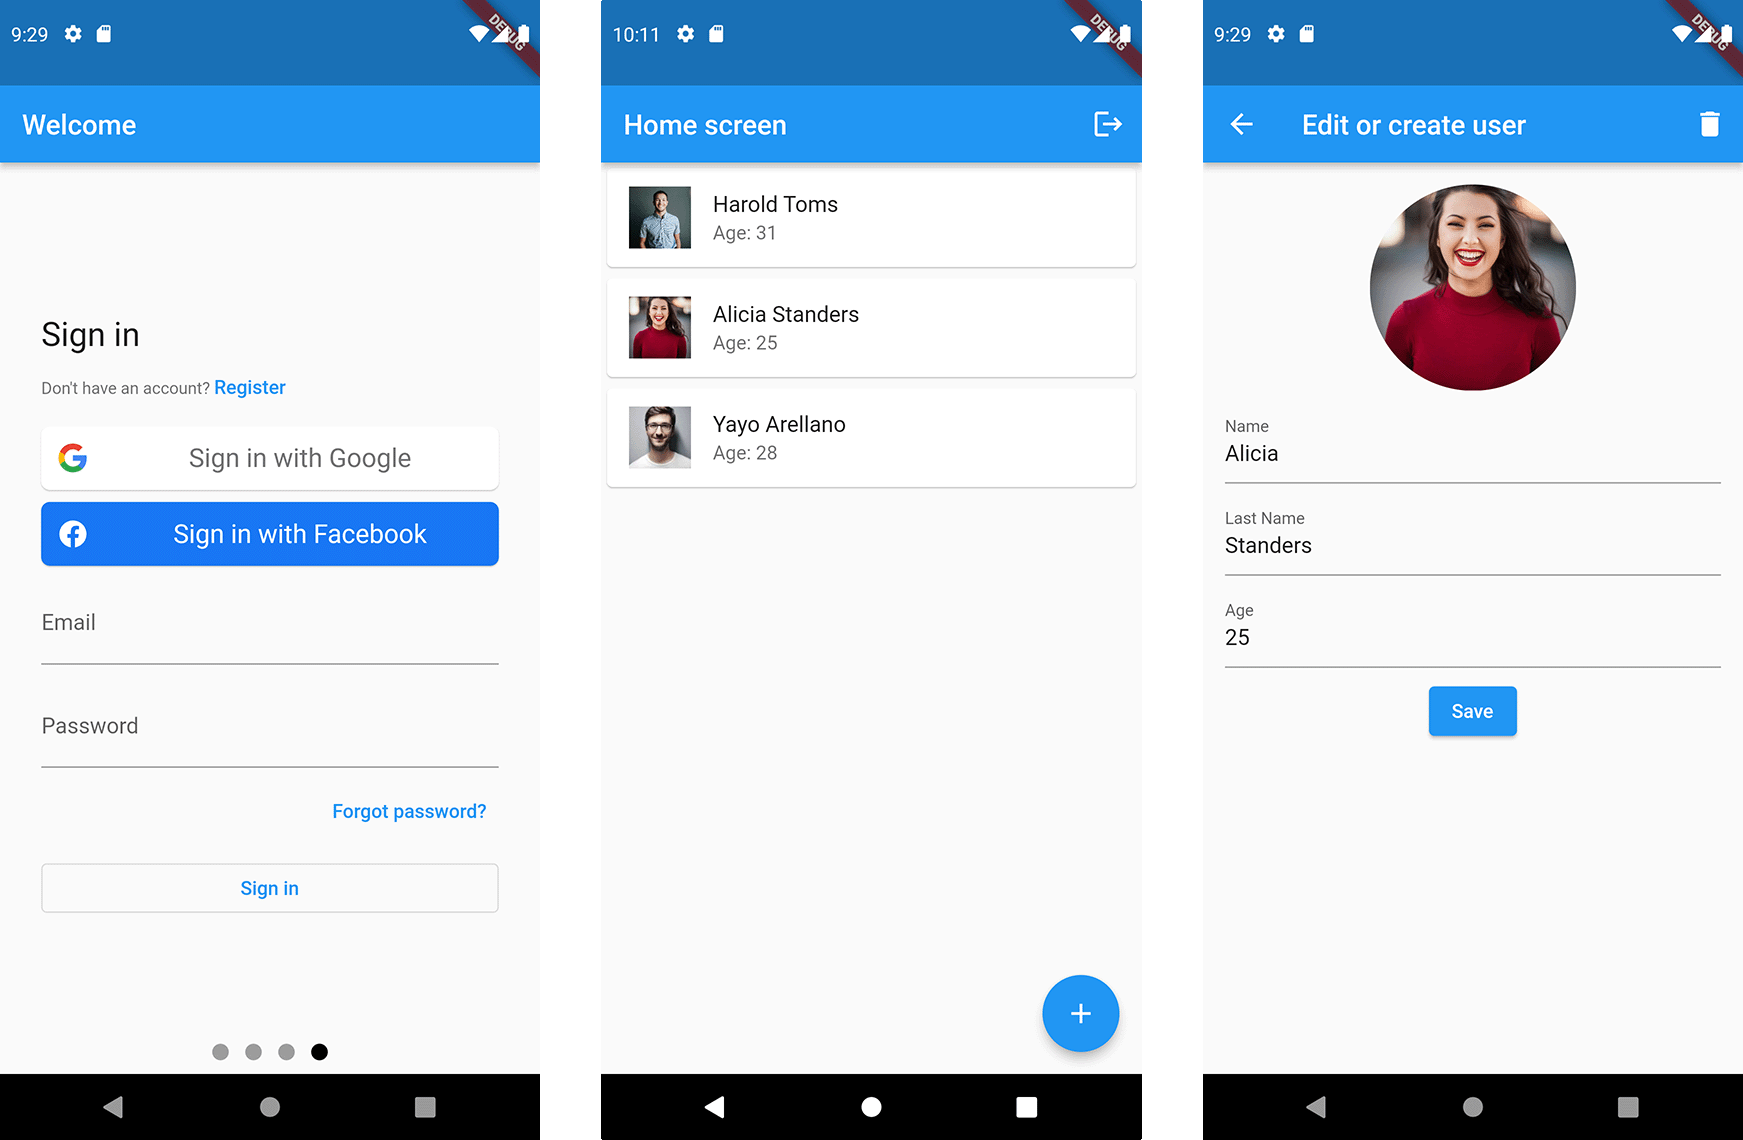
Final result. Login, home, and edit screens
You can find the source code on GitHub
Firebase UI will handle the authentication flow, so we will not have to build it from scratch.
Some of the packages that we will use are:
- State Management: Cubit
- Dependency Injection: GetIt
- Authentication UI: Firebase UI
- Database: Cloud Firestore
- File Storage: Firebase Storage
Workflow
The workflow or user flow can be seen in the next image:

- Splash screen: When the user opens the app, we will show a splash screen while we check if the user is signed in. If the user is signed in, then we show the Home screen otherwise, we show the Intro screen.
- Intro screen: In this screen, we will have a
PageViewto show the introduction of the app and the login section. - Home screen: On the home screen, we will have a
ListViewwith the list of users that we created. Pressing one of the users will open the Edit screen. There is also a+button that will open the Create screen - Edit or Create screen: This is the screen where we can edit or create new users. We can upload a new image and set the name, last name, and age.
Architecture
We are going to separate our code into three main layers: the data layer, business logic and presentation layer. Plus an external data source that in this case will be Firebase.

External Data Sources
The external data sources are all the different sources from which an application can obtain information, such as a database, web API, local files, device sensors, etc.
Data Layer
Manages interactions with data sources and allows other parts of the application to access data in an organized and secure manner. This layer is further divided into data sources and repositories:
Data Source
The data provider's responsibility is to provide raw data. The data provider should be generic and versatile.
Repository
The repository layer is a wrapper around one or more data sources with which our business layer communicates
Business Logic
The business logic layer's responsibility is to respond to input from the presentation layer with new states. This layer can depend on one or more repositories to retrieve data needed to build up the application state.
The business logic layer will contain the cubits that communicate with the presentation layer through events. This layer is a bridge between the UI and the data layer.
Presentation Layer
The presentation layer's responsibility is to figure out how to render itself based on the current state. In addition, it should handle user input and application lifecycle events.
Setting up Firebase
In this article, we will not cover how to set up Firebase. The step-by-step instructions are available in the official documentation Firebase documentation
External Data Source
In our application, the external data sources are the services provided by Firebase: Firebase Authentication, Cloud Storage, and Firestore.
Initially, we are going to focus on the data that we will store in Firestore.
We will create the class MyUser that will have all the properties that we want to store in Firestore.
For example, the name, the lastname, etc.:
class MyUser extends Equatable {
final String id;
final String name;
final String lastName;
final int age;
final String? image;
const MyUser({
required this.id,
required this.name,
required this.lastName,
required this.age,
this.image,
});
List<Object?> get props => [id, name, lastName, age, image];
// Helper function to convert this MyUser to a Map
Map<String, Object?> toFirebaseMap() {
return <String, Object?>{
'id': id,
'name': name,
'lastName': lastName,
'age': age,
'image': image,
};
}
// Helper function to convert a Map to an instance of MyUser
MyUser.fromFirebaseMap(Map<String, Object?> data)
: id = data['id'] as String,
name = data['name'] as String,
lastName = data['lastName'] as String,
age = data['age'] as int,
image = data['image'] as String?;
// Helper function that updates some properties of this instance,
// and returns a new updated instance of MyUser
MyUser copyWith({
String? id,
String? name,
String? lastName,
int? age,
String? image,
}) {
return MyUser(
id: id ?? this.id,
name: name ?? this.name,
lastName: lastName ?? this.lastName,
age: age ?? this.age,
image: image ?? this.image,
);
}
}
Did you notice we are using Equatable in the class MyUser:
- Equatable: It simplifies comparing two objects of the same class without overriding
==andhashCode. You can learn more in this article.
The Data Layer
FirebaseDataSource
The data layer will be split into two the data sources and repositories, the lowest layer is
the FirebaseDataSource class. This class will interact directly with Firebase and will be in charge of
reading the list of users, saving new users, and deleting existing users.
class FirebaseDataSource {

// Helper function to get the currently authenticated user
  User get currentUser {
    final user = FirebaseAuth.instance.currentUser;
    if (user == null) throw Exception('Not authenticated exception');
    return user;
  }

  FirebaseFirestore get firestore => FirebaseFirestore.instance;
  FirebaseStorage get storage => FirebaseStorage.instance;

  // Generates and returns a new firestore id
  String newId() => firestore.collection('tmp').doc().id;

  // Read all documents from MyUser collection from the authenticated user
  Stream<Iterable<MyUser>> getMyUsers() {
    return firestore
        .collection('user/${currentUser.uid}/myUsers')
        .snapshots()
        .map((it) => it.docs.map((e) => MyUser.fromFirebaseMap(e.data())));
  }

  // Creates or updates a document in myUser collection. If image is not null
  // it will create or update the image in Firebase Storage
  Future<void> saveMyUser(MyUser myUser, File? image) async {
    final ref = firestore.doc('user/${currentUser.uid}/myUsers/${myUser.id}');
    if (image != null) {
      // Delete current image if exists
      if (myUser.image != null) {
        await storage.refFromURL(myUser.image!).delete();
      }

      final fileName = image.uri.pathSegments.last;
      final imagePath = '${currentUser.uid}/myUsersImages/$fileName';

      final storageRef = storage.ref(imagePath);
      await storageRef.putFile(image);
      final url = await storageRef.getDownloadURL();
      myUser = myUser.copyWith(image: url);
    }
    await ref.set(myUser.toFirebaseMap(), SetOptions(merge: true));
  }

  // Deletes the MyUser document. Also will delete the
  // image from Firebase Storage
  Future<void> deleteMyUser(MyUser myUser) async {
    final ref = firestore.doc('user/${currentUser.uid}/myUsers/${myUser.id}');

    // Delete current image if exists
    if (myUser.image != null) {
      await storage.refFromURL(myUser.image!).delete();
    }
    await ref.delete();
  }
}
Later, we will use dependency injection with GetIt to inject an instance of the
class FirebaseDataSource so repositories can have access to it.
AuthRepository
The class AuthRepository is part of the data layer upper layer. On big applications, the repositories will wrap one
or more data sources and combine the data into one.
The AuthRepository class will help us to log out of the app and to know the current authentication status.
FirebaseUI will handle log-in directly, so the AuthRepository class will not have any function to handle it.
Let's create an abstract class:
typedef UserUID = String;

abstract class AuthRepository {
  Stream<UserUID?> get onAuthStateChanged;

  Future<void> signOut();
}
Abstract classes are used to decouple our code from implementation-specific details. This can help in the future if we want to swap our real repository with a completely different implementation, or we want to mock the repository in our tests
Now we are going to create the implementation:
class AuthRepositoryImp extends AuthRepository {
final _firebaseAuth = FirebaseAuth.instance;
Stream<UserUID?> get onAuthStateChanged =>
_firebaseAuth.authStateChanges().asyncMap((user) => user?.uid);
Future<void> signOut() => _firebaseAuth.signOut();
}
Later, we will use dependency injection with GetIt to inject an instance of the
class AuthRepositoryImp so cubits can have access to it.
MyUserRepository
This class will help us to read, write and delete from our database. First, we create the abstract class to decouple the implementation details.
abstract class MyUserRepository {
  String newId();

  Stream<Iterable<MyUser>> getMyUsers();

  Future<void> saveMyUser(MyUser myUser, File? image);

  Future<void> deleteMyUser(MyUser myUser);
}
Remember that using an abstraction will give some flexibility to our code. If we want to switch Firebase for another service in the future, we only have to create a new implementation.
Now let's create the implementation:
class MyUserRepositoryImp extends MyUserRepository {
final FirebaseDataSource _fDataSource = getIt();
String newId() {
return _fDataSource.newId();
}
Stream<Iterable<MyUser>> getMyUsers() {
return _fDataSource.getMyUsers();
}
Future<void> saveMyUser(MyUser myUser, File? image) {
return _fDataSource.saveMyUser(myUser, image);
}
Future<void> deleteMyUser(MyUser myUser) {
return _fDataSource.deleteMyUser(myUser);
}
}
Later, we will use dependency injection with GetIt to inject an instance of the
class MyUserRepositoryImp so cubits can have access to it.
Summary
We have completed the data layer. We created the class FirebaseDataSource that will interact directly with Firebase.
We also made two repositories, AuthRepository and MyUserRepository, that in bigger apps will handle complex data
logic like combining data from different data sources.
We also learned how to decouple implementation details using abstract classes. Not it is time to move to the
next layer, the business layer.
Dependency Injection
GetIt
GetIt is a service locator package that helps us adhere to the Dependency Inversion Principle, which aims to reduce coupling between software components and promote flexibility and ease of maintenance.
In the main.dart file we are going to use GetIt to inject
the classes FirebaseDataSource, AuthRepository and MyUserRepository like this:
// Create a global instance of GetIt that can be used
// later to retrieve the injected instances
final getIt = GetIt.instance;

void main() async {
  WidgetsFlutterBinding.ensureInitialized();

  // Initialize firebase
  await Firebase.initializeApp(
    options: DefaultFirebaseOptions.currentPlatform,
  );

  // Inject dependencies
  await injectDependencies();

  runApp(const MyApp());
}

// Helper function to inject dependencies
Future<void> injectDependencies() async {
  // Inject the data source.
  getIt.registerLazySingleton(() => FirebaseDataSource());

  // Inject the Repositories. Note that the type is the abstract class
  // and the injected instance is the implementation.
  getIt.registerLazySingleton<AuthRepository>(() => AuthRepositoryImp());
  getIt.registerLazySingleton<MyUserRepository>(() => MyUserRepositoryImp());
}
Using registerLazySingleton will make the instances initialize only when we want to use them.
Ton access any of the injected instances we can do it like this:
// Get an instance of the FirebaseDataSource
final FirebaseDataSource dataSource = getIt();

// Get an instance of the AuthRepository
final AuthRepository authRepo = getIt();

// Get an instance of the MyUserRepository
final MyUserRepository userRepo = getIt();
The code above can also be written like this:
// Get an instance of the FirebaseDataSource
final dataSource = getIt<FirebaseDataSource>();

// Get an instance of the AuthRepository
final authRepo = getIt<AuthRepository>();

// Get an instance of the MyUserRepository
final userRepo = getIt<MyUserRepository>();
Both ways to retrieve the injected dependencies are correct, so you can use the one you like.
Business Logic
AuthCubit
Can you guess what the job of the AuthCubit class is? Let's take a look at the implementation:
// Enum with all possible authentication states.
enum AuthState {
initial,
signedOut,
signedIn,
}
// Extends Cubit and will emit states of type AuthState
class AuthCubit extends Cubit<AuthState> {
// Get the injected AuthRepository
final AuthRepository _authRepository = getIt();
StreamSubscription? _authSubscription;
AuthCubit() : super(AuthState.initial);
Future<void> init() async {
// Subscribe to listen for changes in the authentication state
_authSubscription = _authRepository.onAuthStateChanged.listen(_authStateChanged);
}
// Helper function that will emit the current authentication state
void _authStateChanged(String? userUID) {
userUID == null ? emit(AuthState.signedOut) : emit(AuthState.signedIn);
}
// Sign-out and immediately emits signedOut state
Future<void> signOut() async {
await _authRepository.signOut();
emit(AuthState.signedOut);
}
Future<void> close() {
_authSubscription?.cancel();
return super.close();
}
}
Did you guess right? In this app, the AuthCubit only has two jobs. The first one is to keep track of the
current authentication state: AuthState.signedIn or AuthState.signedOut and to sign out the user.
Sign-in won't be done in this class because Firebase UI already handles all the flow for us.
Did you notice we also have the state AuthState.initial?
We have this state because the moment we launch the app, we do not know if we are signed in or signed out,
so during those few milliseconds, we will be in the AuthState.initial state.
HomeCubit
The HomeCubit will keep the latest list of myUser objects. Every time one new object is created, the list
will be updated, and a new state will be emitted.
// Extends Cubit and will emit states of the type HomeState
class HomeCubit extends Cubit<HomeState> {
// Get the injected MyUserRepository
final MyUserRepository _userRepository = getIt();
StreamSubscription? _myUsersSubscription;
HomeCubit() : super(const HomeState());
Future<void> init() async {
// Subscribe to listen for changes in the myUser list
_myUsersSubscription = _userRepository.getMyUsers().listen(myUserListen);
}
// Every time the myUser list is updated, this function
// will be called with the latest data
void myUserListen(Iterable<MyUser> myUsers) async {
emit(HomeState(
isLoading: false,
myUsers: myUsers,
));
}
Future<void> close() {
_myUsersSubscription?.cancel();
return super.close();
}
}
// Class that will hold the state of this Cubit
// Extending Equatable will help us to compare if two instances
// are the same without override == and hashCode
class HomeState extends Equatable {
final bool isLoading;
final Iterable<MyUser> myUsers;
const HomeState({
this.isLoading = true,
this.myUsers = const [],
});
List<Object?> get props => [isLoading, myUsers];
}
EditMyUserCubit
The EditMyUserCubit is the one that will help handle creating, deleting, and updating myUser objects.
Let's take a look at the implementation:
// Extends Cubit and will emit states of type EditMyUserState
class EditMyUserCubit extends Cubit<EditMyUserState> {
// Get the injected MyUserRepository
final MyUserRepository _userRepository = getIt();
// When we are editing an existing myUser _toEdit won't be null
MyUser? _toEdit;
EditMyUserCubit(this._toEdit) : super(const EditMyUserState());
// This function will be called from the presentation layer
// when an image is selected
void setImage(File? imageFile) async {
emit(state.copyWith(pickedImage: imageFile));
}
// This function will be called from the presentation layer
// when the user has to be saved
Future<void> saveMyUser(
String name,
String lastName,
int age,
) async {
emit(state.copyWith(isLoading: true));
// If we are editing, we use the existing id. Otherwise, create a new one.
final uid = _toEdit?.id ?? _userRepository.newId();
_toEdit = MyUser(
id: uid,
name: name,
lastName: lastName,
age: age,
image: _toEdit?.image);
await _userRepository.saveMyUser(_toEdit!, state.pickedImage);
emit(state.copyWith(isDone: true));
}
// This function will be called from the presentation layer
// when we want to delete the user
Future<void> deleteMyUser() async {
emit(state.copyWith(isLoading: true));
if (_toEdit != null) {
await _userRepository.deleteMyUser(_toEdit!);
}
emit(state.copyWith(isDone: true));
}
}
// Class that will hold the state of this Cubit
// Extending Equatable will help us to compare if two instances
// are the same without override == and hashCode
class EditMyUserState extends Equatable {
final File? pickedImage;
final bool isLoading;
// In the presentation layer, we will check the value of isDone.
// When it is true, we will navigate to the previous page
final bool isDone;
const EditMyUserState({
this.pickedImage,
this.isLoading = false,
this.isDone = false,
});
List<Object?> get props => [pickedImage?.path, isLoading, isDone];
// Helper function that updates some properties of this object,
// and returns a new updated instance of EditMyUserState
EditMyUserState copyWith({
File? pickedImage,
bool? isLoading,
bool? isDone,
}) {
return EditMyUserState(
pickedImage: pickedImage ?? this.pickedImage,
isLoading: isLoading ?? this.isLoading,
isDone: isDone ?? this.isDone,
);
}
}
Summary
The work on the Business Logic layer is done. We have created three cubits that will help with the authentication,
fetching the list of the users and creating, updating, and deleting myUser objects.
The AuthCubit will be injected on the very top of the widget tree so every child can access the current
authentication state. The HomeCubit and EditMyUserCubit will be scoped to their respective screens.
Presentation Layer:
Navigation and initial flow: Home Screen or Intro Screen
When the app is launched, we have to decide if we are going to show the Home Screen or the Intro Page
The way we will do it is that as soon as the app is launched, we will show a Splash Screen, and also, we will be checking the current authentication state, so we can decide where we will navigate.
1. Initialize AuthCubit at the top of the widget tree
The first thing to do is initializing the AuthCubit so we can know the authentication state. So will go to
the main.dart file and do the following modification:
  runApp(
    // AuthCubit will be at the top of the widget tree
    BlocProvider(
      create: (_) => AuthCubit()..init(),
      child: const MyApp(),
    ),
  );
This will put the AuthCubit at the very top of the widget tree, allowing us to access that authentication state in any app widget.
2. Create all routes supported by the app
We will now create all the possible routes our app will handle. So I will make a new
file routes.dart with four routes splash, intro, home, and editUser:
class Routes {
  static const splash = '/';
  static const intro = '/intro';
  static const home = '/home';
  static const editUser = '/editUser';

  static Route routes(RouteSettings settings) {
    // Helper nested function.
    MaterialPageRoute buildRoute(Widget widget) {
      return MaterialPageRoute(
        builder: (_) => widget,
        settings: settings,
      );
    }

    switch (settings.name) {
      case splash:
        return buildRoute(const SplashScreen());
      case intro:
        return buildRoute(const IntroScreen());
      case home:
        return buildRoute(const HomeScreen());
      case editUser:
        return buildRoute(const EditMyUserScreen());
      default:
        throw Exception('Route does not exists');
    }
  }
}
Did you notice that the initial route is the Splash Screen?
3. Navigate to the right page using BlocListener
Use a BlocListener to listen for the authentication state changes and decide where we should navigate.
This time we go to the app.dart file and update the code like this:
final _navigatorKey = GlobalKey<NavigatorState>();
class MyApp extends StatelessWidget {
const MyApp({super.key});
Widget build(BuildContext context) {
// Listen for authentication state changes and
// navigate to the intro or home screens
return BlocListener<AuthCubit, AuthState>(
listener: (context, state) {
if (state == AuthState.signedOut) {
_navigatorKey.currentState
?.pushNamedAndRemoveUntil(Routes.intro, (r) => false);
} else if (state == AuthState.signedIn) {
_navigatorKey.currentState
?.pushNamedAndRemoveUntil(Routes.home, (r) => false);
}
},
child: MaterialApp(
navigatorKey: _navigatorKey,
title: 'Authentication Flow',
onGenerateRoute: Routes.routes,
),
);
}
}
One thing we should not miss is that the BlocListener will be active during the entire
life cycle of the app, so if the user sign-outs, the listener will trigger, and it will navigate to
the Intro Screen.
The Splash Screen
The Splash Screen is to let the user know we are loading the app. Most of the time, this screen will be shown so fast the user may not even notice it. The UI will look like this:
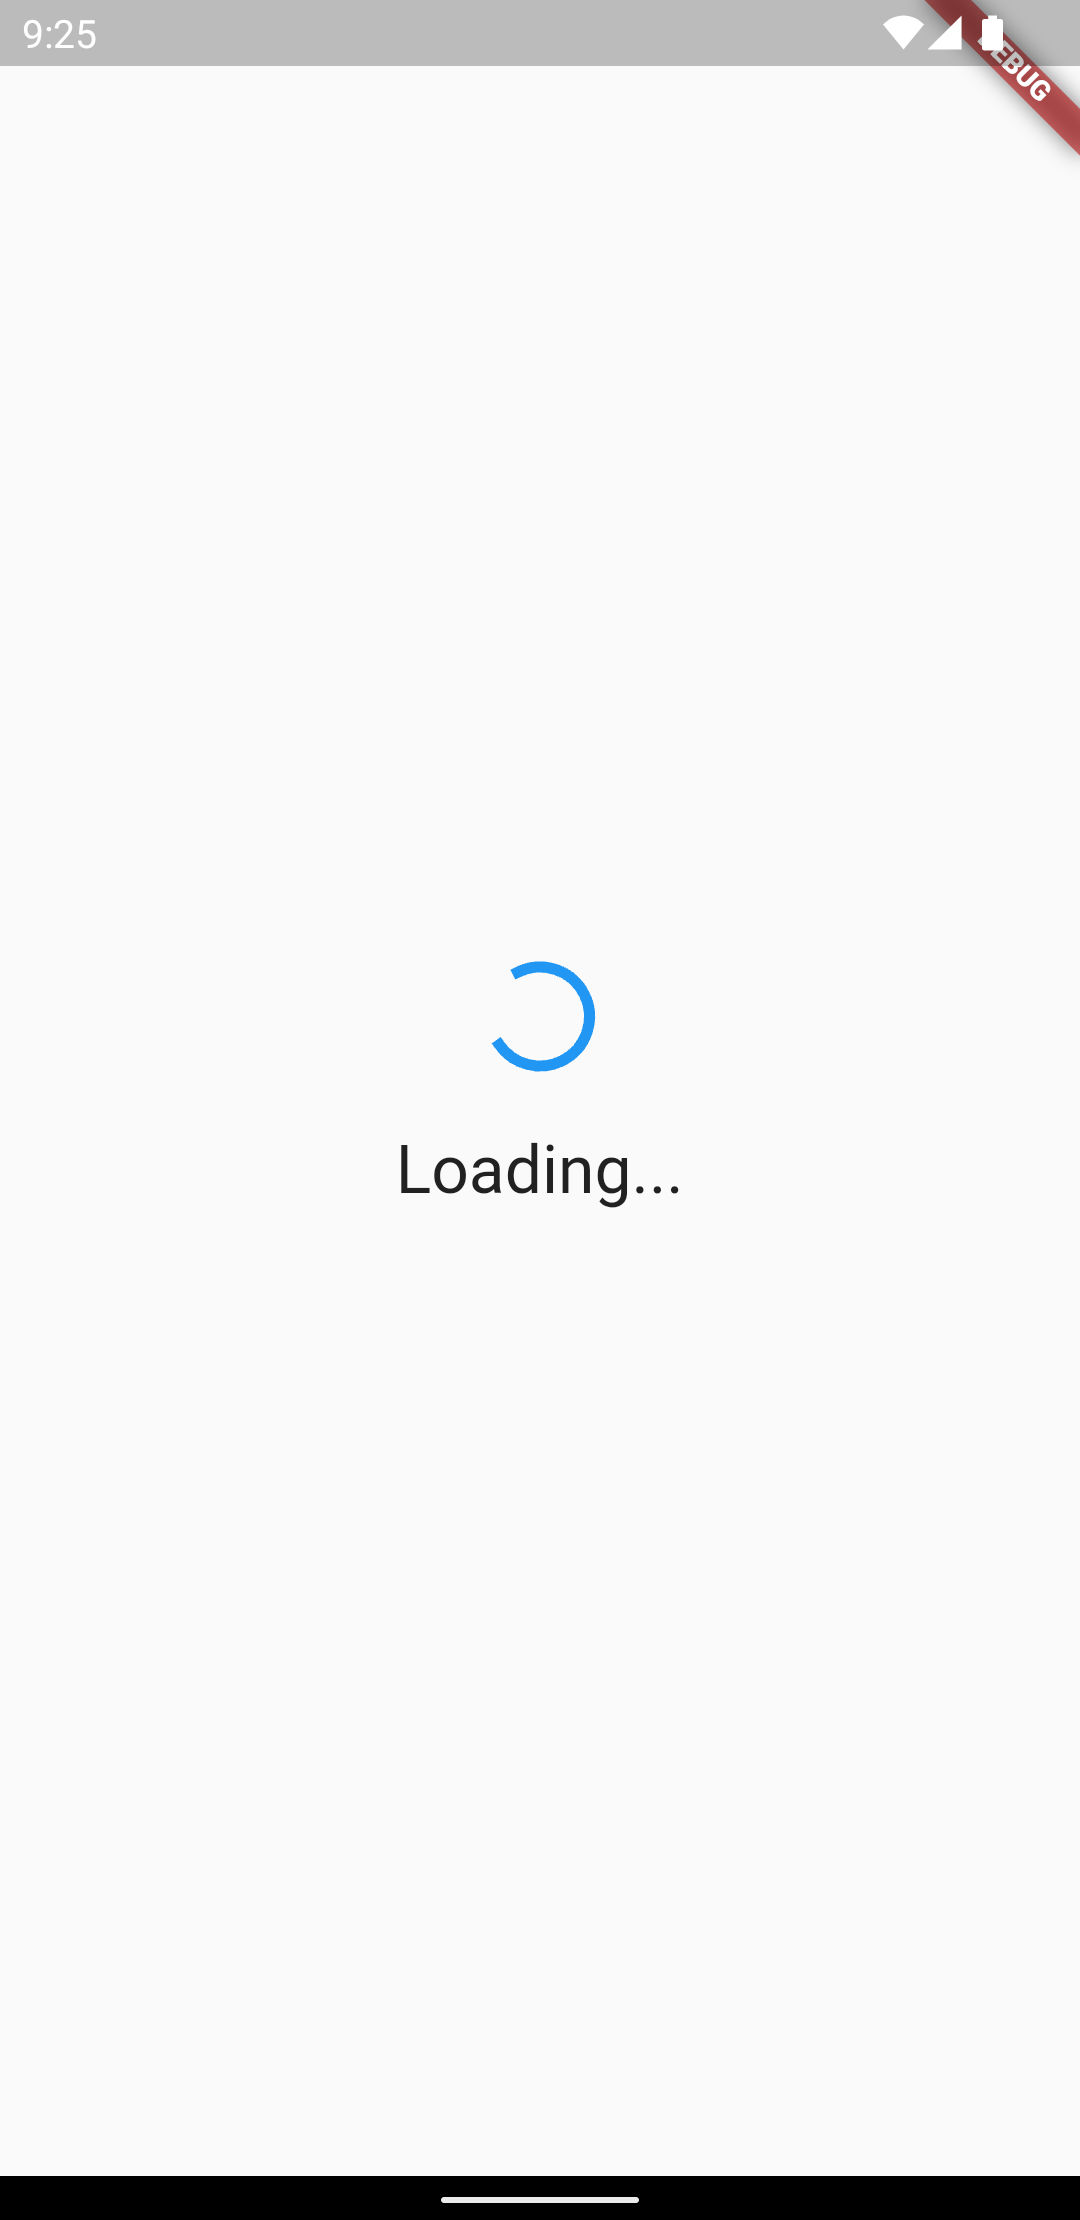
The Splash Screen
Let's take a look at the code implementation:
class SplashScreen extends StatelessWidget {
const SplashScreen({super.key});
Widget build(BuildContext context) {
return Scaffold(
body: Center(
child: Column(
mainAxisAlignment: MainAxisAlignment.center,
children: const [
CircularProgressIndicator(),
SizedBox(height: 24),
Text('Loading...', style: TextStyle(fontSize: 24)),
],
),
),
);
}
}
Intro and Login Screens
The Intro and Login will be inside a PageView. We can show a description on the Intro page, and
the Login will be created using Firebase UI. The final result will look like this:

Intro and Login Screens
Let's create a new file, intro_screen.dart and add some code to it:
// Replace with your client id
final googleClientId = kIsWeb || Platform.isAndroid
? 'your-android-and-web-client-id'
: 'your-ios-client-id';
// Replace with your client id
const facebookClientId = 'your-facebook-client-id';
class IntroScreen extends StatelessWidget {
const IntroScreen({super.key});
Widget build(BuildContext context) {
return Scaffold(
appBar: AppBar(
title: const Text('Welcome'),
),
body: _IntroPager(),
);
}
}
class _IntroPager extends StatelessWidget {
final String exampleText =
'Lorem ipsum dolor sit amet, consecrated advising elit, '
'sed do eiusmod tempor incididunt ut labore et '
'dolore magna aliqua. Ut enim ad minim veniam.';
Widget build(BuildContext context) {
return PageIndicatorContainer(
align: IndicatorAlign.bottom,
length: 4,
indicatorSpace: 12,
indicatorColor: Colors.grey,
indicatorSelectorColor: Colors.black,
child: PageView(
children: <Widget>[
_DescriptionPage(
text: exampleText,
imagePath: 'assets/intro_1.png',
),
_DescriptionPage(
text: exampleText,
imagePath: 'assets/intro_2.png',
),
_DescriptionPage(
text: exampleText,
imagePath: 'assets/intro_3.png',
),
_LoginPage(),
],
),
);
}
}
class _DescriptionPage extends StatelessWidget {
final String text;
final String imagePath;
const _DescriptionPage({
required this.text,
required this.imagePath,
});
Widget build(BuildContext context) {
return Container(
padding: const EdgeInsets.all(24.0),
child: Column(
crossAxisAlignment: CrossAxisAlignment.center,
children: <Widget>[
Image.asset(
imagePath,
width: 200,
height: 200,
),
Expanded(
child: Container(
alignment: Alignment.center,
child: Text(
text,
textAlign: TextAlign.center,
style: const TextStyle(
fontSize: 24.0,
fontWeight: FontWeight.bold,
),
),
),
),
],
),
);
}
}
class _LoginPage extends StatelessWidget {
Widget build(BuildContext context) {
return SignInScreen(
providers: [
GoogleProvider(clientId: googleClientId),
FacebookProvider(clientId: facebookClientId),
EmailAuthProvider(),
],
);
}
}
If you are a good observer, you have already noticed that there is no code to handle navigation in
the intro_screen.dart file. Do you know why? Remember that we already take care of the Home Screen
navigation in the app.dart file.
Home Screen
The Home Screen may look basic, but many things are happening here. Take a look for one minute at the UI. Can you find all the things the user can do?

The Home Screen
Did you find all the things the user can do? Let's see, the user can:
- Sign out from the app
- See the list of users
- Tap a row in the list to edit the user
- Tap in the
+floating button to create a new user
Let's create a new file, home_screen.dart and add some code to it:
class HomeScreen extends StatelessWidget {
const HomeScreen({super.key});
Widget build(BuildContext context) {
return Scaffold(
appBar: AppBar(
title: const Text('Home screen'),
actions: [
IconButton(
onPressed: () {
// Get the instance of AuthCubit and signOut
final authCubit = context.read<AuthCubit>();
authCubit.signOut();
},
icon: const Icon(Icons.logout),
),
],
),
floatingActionButton: FloatingActionButton(
child: const Icon(Icons.add),
onPressed: () {
// Navigate to the editUser route without arguments
// to create a new myUser
Navigator.pushNamed(context, Routes.editUser);
},
),
// Use BlocProvider to pass the HomeCubit to the widget tree
body: BlocProvider(
create: (context) => HomeCubit()..init(),
child: BlocBuilder<HomeCubit, HomeState>(
builder: (context, state) {
return ListView.builder(
itemCount: state.myUsers.length,
itemBuilder: (context, index) {
final myUser = state.myUsers.elementAt(index);
return Card(
child: ListTile(
onTap: () {
// Navigate to the editUser route with arguments
// to edit the tapped myUser
Navigator.pushNamed(context, Routes.editUser, arguments: myUser);
},
leading: SizedBox(
height: 45,
width: 45,
child: CustomImage(imageUrl: myUser.image),
),
title: Text('${myUser.name} ${myUser.lastName}'),
subtitle: Text('Age: ${myUser.age}'),
),
);
},
);
},
),
),
);
}
}
Edit and Create MyUser Screen
Editing and creating myUser objects will be done in the same EditMyUserScreen class. The user will be able to:
- Choose a profile image
- Edit name, last name, and age
- Save new or existing user
- Delete existing users
The UI will look like this:
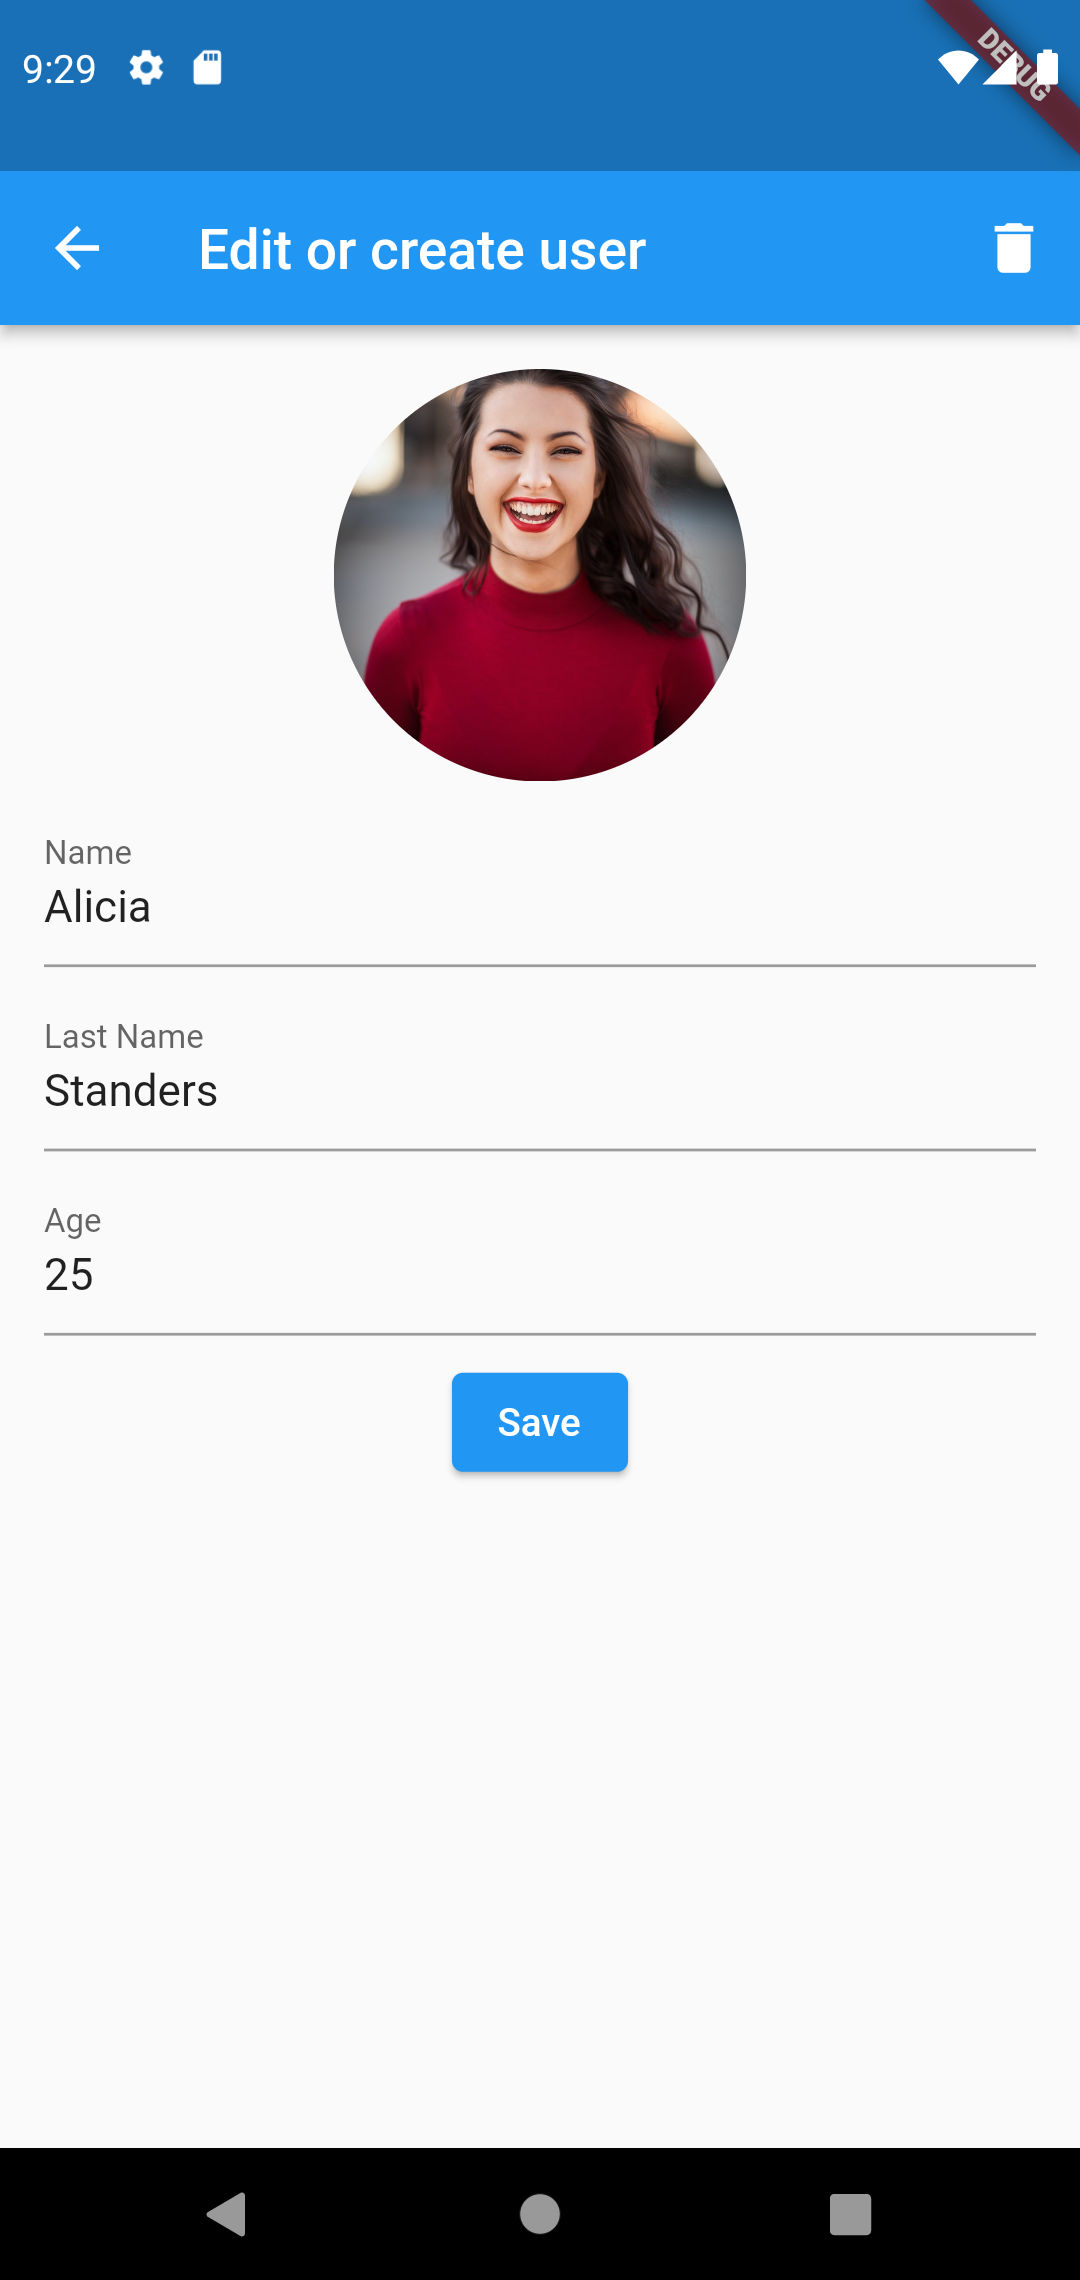
The edit and create user screen
Let's create a new file, edit_my_user_screen.dart and add some code to it:
class EditMyUserScreen extends StatelessWidget {
const EditMyUserScreen({super.key});
Widget build(BuildContext context) {
// If userToEdit is not null it means we are editing
final userToEdit = ModalRoute.of(context)?.settings.arguments as MyUser?;
return BlocProvider(
create: (context) => EditMyUserCubit(userToEdit),
child: Scaffold(
appBar: AppBar(
title: const Text('Edit or create user'),
actions: [
Builder(builder: (context) {
// If we are creating a new myUser do not show the
// delete button
return Visibility(
visible: userToEdit != null,
child: IconButton(
icon: const Icon(Icons.delete),
onPressed: () {
context.read<EditMyUserCubit>().deleteMyUser();
},
),
);
}),
],
),
body: BlocConsumer<EditMyUserCubit, EditMyUserState>(
listener: (context, state) {
if (state.isDone) {
// When isDone is true we navigate to the previous screen/route
Navigator.of(context).pop();
}
},
builder: (_, state) {
return Stack(
children: [
_MyUserSection(
user: userToEdit,
pickedImage: state.pickedImage,
isSaving: state.isLoading,
),
if (state.isLoading)
Container(
color: Colors.black12,
child: const Center(
child: CircularProgressIndicator(),
),
),
],
);
},
),
),
);
}
}
class _MyUserSection extends StatefulWidget {
final MyUser? user;
final File? pickedImage;
final bool isSaving;
const _MyUserSection({this.user, this.pickedImage, this.isSaving = false});
_MyUserSectionState createState() => _MyUserSectionState();
}
class _MyUserSectionState extends State<_MyUserSection> {
final _nameController = TextEditingController();
final _lastNameController = TextEditingController();
final _ageController = TextEditingController();
final picker = ImagePicker();
void initState() {
_nameController.text = widget.user?.name ?? '';
_lastNameController.text = widget.user?.lastName ?? '';
_ageController.text = widget.user?.age.toString() ?? '';
super.initState();
}
Widget build(BuildContext context) {
return SingleChildScrollView(
child: Container(
padding: const EdgeInsets.all(16),
child: Column(
crossAxisAlignment: CrossAxisAlignment.center,
children: [
GestureDetector(
onTap: () async {
final editCubit = context.read<EditMyUserCubit>();
final pickedImage =
await picker.pickImage(source: ImageSource.gallery);
if (pickedImage != null) {
editCubit.setImage(File(pickedImage.path));
}
},
child: Center(
child: ClipOval(
child: SizedBox(
width: 150,
height: 150,
child: CustomImage(
imageFile: widget.pickedImage,
imageUrl: widget.user?.image,
),
),
),
),
),
const SizedBox(height: 8),
TextField(
controller: _nameController,
decoration: const InputDecoration(labelText: 'Name'),
),
const SizedBox(height: 8),
TextField(
controller: _lastNameController,
decoration: const InputDecoration(labelText: 'Last Name'),
),
const SizedBox(height: 8),
TextField(
controller: _ageController,
keyboardType: TextInputType.number,
decoration: const InputDecoration(labelText: 'Age'),
),
const SizedBox(height: 8),
// When isSaving is true we disable the button
ElevatedButton(
onPressed: widget.isSaving
? null
: () {
context.read<EditMyUserCubit>().saveMyUser(
_nameController.text,
_lastNameController.text,
int.tryParse(_ageController.text) ?? 0,
);
},
child: const Text('Save'),
),
],
),
),
);
}
}
Finally, we created the widgets needed for the UI of our app.
Cubit and Widget Tests
I've written some cubit and widget tests for this article. They are located in the source code test folder that you can download from GitHub. Try to run the tests by yourself.
Conclusion
Now we have a working app that can write, read and delete documents into Firebase Firestore and also write, read and delete files into Firebase Storage.
We learned a simple architecture that allows us to split our code into several layers and create a code base that is easier to maintain and test.
Please let me know your questions or comments, and if you liked this article, please help me share it. Thank you!